Interacting with svg-objects in Selenium Java


Svg is a format for describing vector graphics that was adopted to W3C standards family in 1999. The graphics described in such format can be "understood" and hence rendered by the majority of contemporary browsers. Besides, the big advantage of svg is that it can be embedded into the DOM-structure of host web-page, which makes possible to build such graphics interactive. Thank to these properties of svg one can find quite a lot of websites where UI (or part of UI) is built over it. For the hypothetical test automation engineer that might mean that sooner or later they would have to code automated test (over #Selenium framework possibly) for such interface. In this post we’re going to code such test, using simple example of svg UI that I have prepared for you.
Example description
The example represents a model of traffic lights that is control with the help of button. It is supposed to work in two modes: "correct" and "incorrect" (the latter is for the sake of demonstration). In "correct" mode the colors are switched one after another from the top to bottom. In "incorrect" mode after green light both red and green become enabled. The user can switch between modes with checking corresponding check-box. We’re going to write the test that would check the order of light switching in both modes. The picture below is interactive. You can try to interact with it in "manual" mode.
Get prepared for test development
We’ll be developing the test in Java language. In my example I’m going to use FireFox browser and Linux operating system. Also except of Selenium I’m planning to use Maven and JUnit. If you’re not yet familiar with these frameworks that should not be a big problem. Conceptually they have nothing to do with the topic we’re discussing. I’m going to use them in order to minimize the amount of code not directly related to Selenium, so that I can concentrate more on the important topic. In order to get the access to the required libraries, make sure that you pom.xml file looks like approximately this:
<?xml version="1.0" encoding="UTF-8"?>
<project xmlns="http://maven.apache.org/POM/4.0.0"
         xmlns:xsi="http://www.w3.org/2001/XMLSchema-instance"
         xsi:schemaLocation="http://maven.apache.org/POM/4.0.0 http://maven.apache.org/xsd/maven-4.0.0.xsd">
    <modelVersion>4.0.0</modelVersion>

    <groupId>webelement-click</groupId>
    <artifactId>selenium-svg-example</artifactId>
    <version>1.0-SNAPSHOT</version>

    <dependencies>
        <!-- https://mvnrepository.com/artifact/org.seleniumhq.selenium/selenium-java -->
        <dependency>
            <groupId>org.seleniumhq.selenium</groupId>
            <artifactId>selenium-java</artifactId>
            <version>3.141.59</version>
        </dependency>
        <!-- https://mvnrepository.com/artifact/org.junit.jupiter/junit-jupiter-api -->
        <dependency>
            <groupId>org.junit.jupiter</groupId>
            <artifactId>junit-jupiter-api</artifactId>
            <version>5.5.2</version>
            <scope>test</scope>
        </dependency>

    </dependencies>

</project>
After that, download webdriver for your OS and your browser and place it to the appropriate folder. At the moment I was preparing this article the official webdriver for FireFox browser is Geckodriver that is available for downloading by this link. If you’re using Linux OS, it is also worth making sure that your user has the privileges to execute the executable file of webdriver.
Writing base code for the test
Lets write couple of lines in order to ensure the proper starting up of tests and proper shutting down of tests. In this fragment we will be using JUnit annotations (if you’re not still familiar with Java annotations I strongly recommend to read about some basic things regarding them). Doing that we’ll mark up our code in a special way so that the framework is aware of which components compose our test code and in which order they are to be executed.
package click.webelement;

import org.junit.jupiter.api.AfterEach;
import org.junit.jupiter.api.BeforeAll;
import org.junit.jupiter.api.BeforeEach;
import org.junit.jupiter.api.Test;
import org.openqa.selenium.WebDriver;
import org.openqa.selenium.firefox.FirefoxDriver;

public class SvgUITest {

    final static String RED = "red";
    final static String YELLOW = "yellow";
    final static String GREEN = "green";
    final static String ON = "on";
    final static String OFF = "off";

    WebDriver driver;

    @BeforeAll
    public static void globalSetup(){
        System.setProperty("webdriver.gecko.driver", "/home/alexey/Dev/webdrivers/geckodriver");
    }

    @BeforeEach
    public void setUp(){
        driver = new FirefoxDriver();
        driver.get("http://webelement.click/en/selenium_and_svg_example_java");
    }

    @AfterEach
    public void tearDown(){
        if(driver != null){
            driver.quit();
        }
    }

    @Test
    public void testThatShouldPassSVGUI(){

    }

    @Test
    public void testThatShouldFailSVGUI(){

    }

}
Here we have marked up the code with annotations thus sayed to JUnit that before all test are starting up we need to set up the path to the webdriver (it would be likely different in your case). Also before each of tests is executed we need to re-create webdriver object in order to waste all the noise that could be earned by the moment (like cookies, etc.). Except all the said, each of our tests should start from calling the web page with this example, so it makes sense to include calling the page into test preparation steps. Finally (actually the order of actions does not matter) we’re saying to JUnit that our test class contains two tests. My idea was that the first test would demonstrate that everything is fine in "correct" mode but the second one would fail in "incorrect" mode while both the tests would pass the same set of steps (except of switching the modes of course).
Among other things, we have defined the set of constants as the fields of
SvgUITestclass. Using constants is considered a good practice in programming when there are several (more than one) actual (or expected in future) places in code where you’re going to use the value. The advantage of this approach is straightforward. First of all if you will need to change the value used in the code you will have to just amend constant value where it is defined. You wouldn’t have to fix all the places. The second thing is that you reduce human factor risk as the modern IDEs can assist you when you write constant name so that it is less likely to introduce any sort of typo. After all the compilation phase would highlight the problematic places that were missed by your code assistant.
Creating testThatShouldFailSVGUI
Since both the tests will be taking the same set of steps (almost the same), it makes sense to take this code out to the separate method so that we could re-use it in each particular test. The reservation "almost" was made because of the test that has to fail (for the purpose of demonstration) will have to make one step more in order to switch the model work mode. So lets add the code that would be doing the following:
-
On the step zero - check that the red light is the first one, yellow light is the second one and green light is the third one.
-
On the first step check that red light is on, then push the button.
-
On the second step check that yellow light is on, then push the button.
-
On the third step check that green light is on, then push the button
-
On the fourth step check that red light is on again.
-
On each step check that all the light irrelevant to the step are off.
Before starting to code the test, we need to define what would "on/off" mean. How do we detect if a light is on or off. If we use development tools of the browser we can see that firstly each light has its id attribute, and secondly each light has its class attribute defining the light’s style. The class defines the color of the light and its state (either it is on or off). For example the red light switched on would have class="red on", and the green light switched off would have class="green off". Below you can find the method code that we will discuss later.
    private void takeTestSteps(){
        for(int i = 1; i <= 4; i++){

            List<WebElement> lights = driver.findElements(By.xpath("//*[name()='circle' and contains(@id, '-light')]"));
            Assertions.assertEquals(3, lights.size(), "Expecting three lights available");

            List<String> assumedRedClasses = Arrays.asList(lights.get(0).getAttribute("class").split(" "));
            List<String> assumedYellowClasses = Arrays.asList(lights.get(1).getAttribute("class").split(" "));
            List<String> assumedGreenClasses = Arrays.asList(lights.get(2).getAttribute("class").split(" "));

            Assertions.assertTrue(assumedRedClasses.size() == 2
                    && assumedYellowClasses.size() == 2
                    && assumedGreenClasses.size() == 2,
                    "Only color and status are expected in class attribute");
            Assertions.assertTrue(assumedRedClasses.contains(RED), "First light is expected to be red");
            Assertions.assertTrue(assumedYellowClasses.contains(YELLOW), "Second light is expected to be yellow");
            Assertions.assertTrue(assumedGreenClasses.contains(GREEN), "Third light is expected to be green");

            switch (i % 3){
                case 1:
                    Assertions.assertTrue(assumedRedClasses.contains(ON), "Expecting red light on");
                    Assertions.assertTrue(assumedYellowClasses.contains(OFF), "Expecting yellow light off");
                    Assertions.assertTrue(assumedGreenClasses.contains(OFF), "Expecting green light off");
                    break;
                case 2:
                    Assertions.assertTrue(assumedRedClasses.contains(OFF), "Expecting red light off");
                    Assertions.assertTrue(assumedYellowClasses.contains(ON), "Expecting yellow light on");
                    Assertions.assertTrue(assumedGreenClasses.contains(OFF), "Expecting green light off");
                    break;
                case 3:
                    Assertions.assertTrue(assumedRedClasses.contains(OFF), "Expecting red light off");
                    Assertions.assertTrue(assumedYellowClasses.contains(OFF), "Expecting yellow light off");
                    Assertions.assertTrue(assumedGreenClasses.contains(ON), "Expecting green light on");
                    break;
            }

            WebElement switchButton = driver.findElement(By.xpath("//*[@id='switch-button']"));
            ((JavascriptExecutor)driver).executeScript("arguments[0].scrollIntoView(true)", switchButton);

            new Actions(driver).moveToElement(switchButton, 0, -40).click().build().perform();
        }
    }
What is going on in this method? In fact, here are only few lines where we use Selenium. Like, actually, in a typical automated test. The most part of the code defines the logic of assertions, data parsing, etc. I separated the important parts with empty lines so that it would be easier to associate what I’m going to explain with what is coded above. First what we need to note is that the method entirely consists of one loop. The loop is to pass for steps so that we could test "looping" the light switch when green is to change to red light.
Each step of our loop starts from picking all the lights of the model using the xPath //*[name()='circle' and contains(@id, '-light')]. Since svg elements have their own namespace (different from html elements namespace) we cannot just use the construction like //circle. The result we have got we will use for detecting if the switching order is correct. Yet, in the line Assertions.assertEquals(3, lights.size(), "Expecting three lights available"); we’re testing that the number of lights that our model has is three (not less and not more). By the way, Assertions.* become available for us only after we set JUnit dependency for our project.
Probably in the real life the part of the code that uses Selenium will be bigger than in my example. As I have prepared the example on my own, I tried to keep the balance between model development effort and the size of test code demonstrating what I planned to demonstrate. In my examples the key components are assigned with their ids and have adequate class names. In real life everything could be different so in some cases one would have to use more tricky locators or introduce more code for proper parsing the data.
In next three lines we parse class attribute of each light so that we get list of classes for them. We convert the arrays to lists so that it would be easier to test if element classes contain certain value or not further in the test.
In remaining lines (before switch clause) we’re testing that each light is assigned with only two classes and that the order of the lights corresponds to expected state. Then we’re reaching the logic responsible for checking if the lights are switched correctly
The line with switch statement evaluates the expression i % 3. This is division by modulo operation that is required for testing the fourth step. Since 4 % 3 = 1 we’re test the fourth step like if it would be the first one. For the same reason we start our loop from i = 1 that doesn’t not look quite typical, right?
On each step, test logic checks if the state of colors is relevant to the step number. It is achieved by testing if on or off class is included into the list of parsed element classes we obtained before. The logic also implies that the element cannot have both on and off states together. This is implied because of our sequential checks. Firstly we check that the element has the class that defines its color, then we check that the element has two classes in total and then we check that the element has either on or off classes.
After we have tested the light states for current step we need to push the button and start the next step. In my example that turned out that it was not enough to just locate an element and invoke click() method against it. The fact is that in order to save the time I implemented the button as a circle. That circle is placed behind the blue rectangle so that it looks like a semi-sphere. However when Selenium tries to click it the coordinates of such click are also the coordinates of that blue rectangle. Since it is on the foreground it receives the click that is intended to be dispatched to the button. This causes Selenium to through the exception.
To address the issue above we first move the cursor to the circle element, then move it a bit upper by the offset of 40 pixels and then perform click action.
Okay, we have just finished preparing the common test steps. Add this method (in my case it is private void takeTestSteps()) to SvgUITest class. We now should call it from our test methods. Do not forget that the test that we designed to fail, we need to add the step that switches model work mode. Test methods after our changes will look like this:
    @Test
    public void testThatShouldPassSVGUI(){
        takeTestSteps();
    }

    @Test
    public void testThatShouldFailSVGUI(){
        driver.findElement(By.id("buggy-chkbx")).click();
        takeTestSteps();
    }
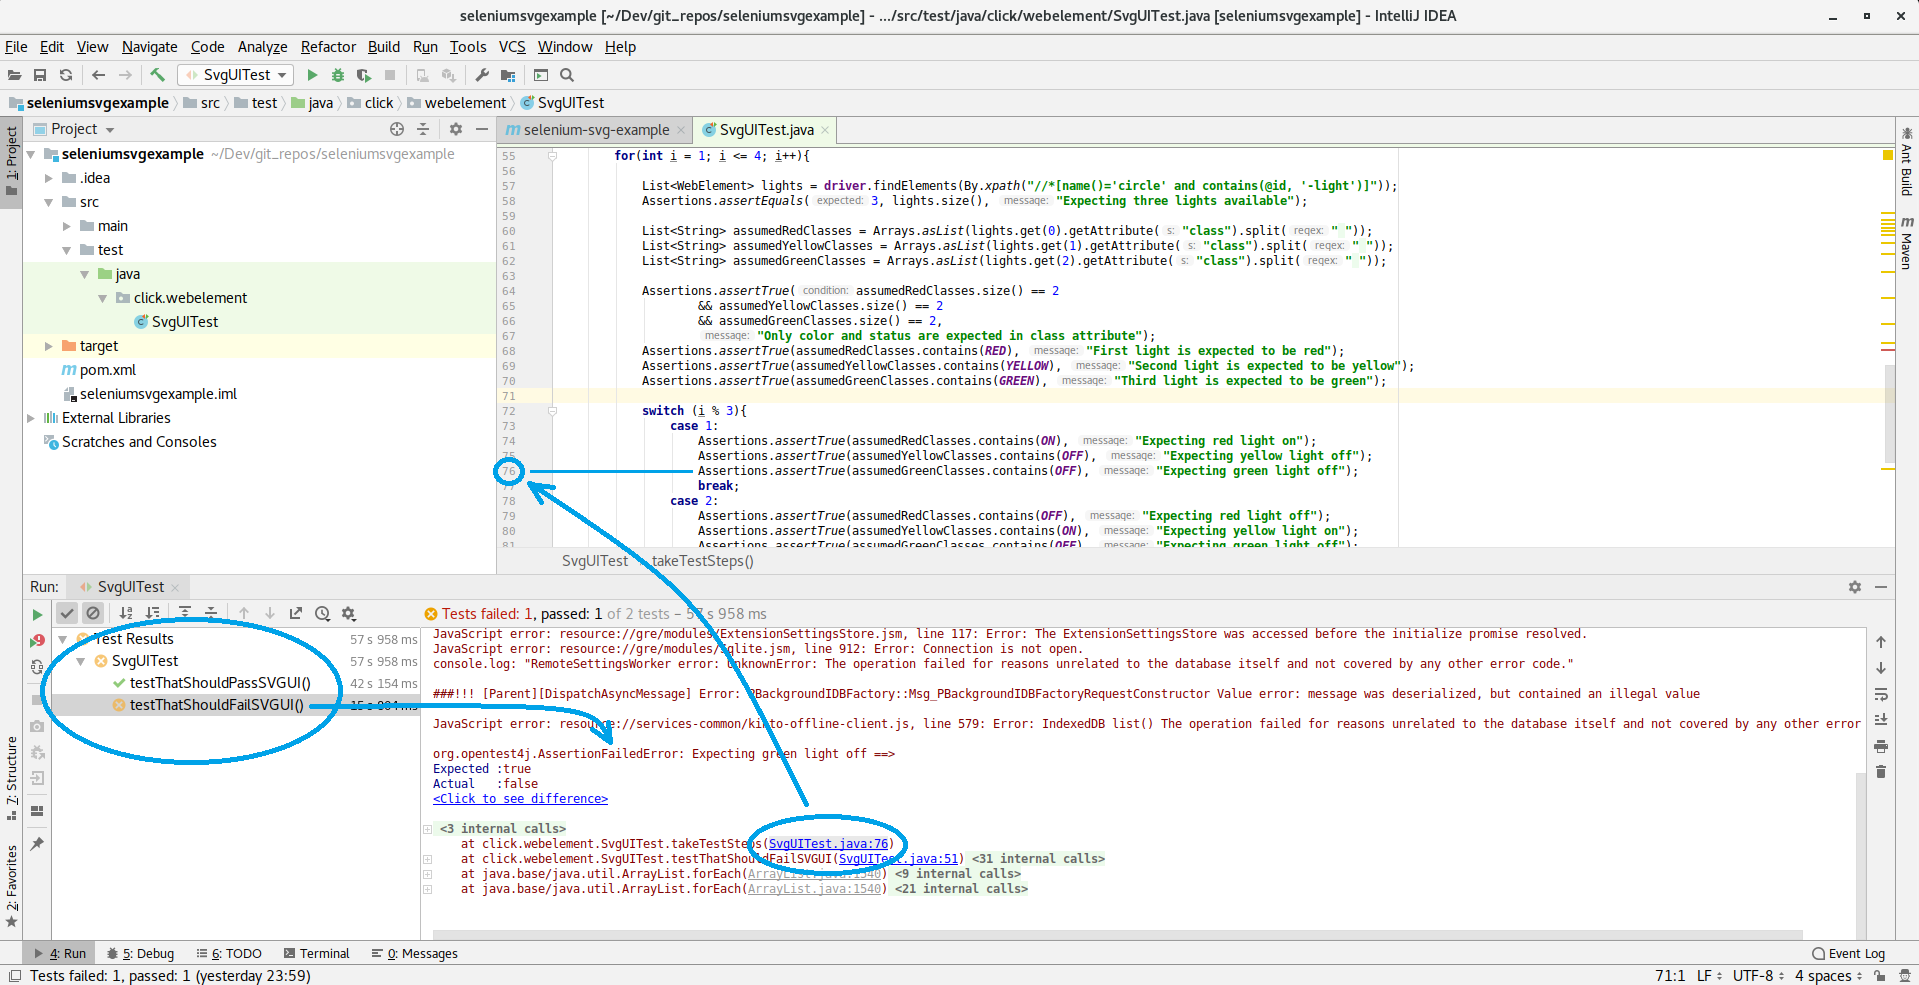
When you run the entire class, you will see that we reached our goal. One test passed successfully, another one failed. It failed exactly in the place we expected (where we check if the light states are relevant to the first/fourth step).
Still have questions? Ask them here. I will try to extend the article with missed points leaning on your feedback.